
8 Best Upper Back Exercises to Get Rid of Back Issues
Upper back muscles are crucial for overall strength and mass. They cover your back’s entire width. I recommend adding Best Upper Back Exercises to your routine. This helps you build a bigger, more muscular back.
Wondering how to strengthen your back muscles?
Let me share eight top upper back exercises with you. They’re great for increasing mass and strength. These exercises target your trapezius, rhomboids, and mid-back. You can do them on the floor, or with bands and dumbbells. I assure you, these exercises make every rep count for maximum upper back growth.
8 Best Upper Back Exercises for Mass & Strength Workouts
Let’s explore all of those workouts you can perform for an ideal upper back:
1. Bent-Over Barbell Row
First of all, bent-over barbell row is a classic upper-back exercise I highly recommend. It delivers significant results. You can perform it with either an underhand or overhand grip.
When using an underhand grip, I advise you to stand upright with your feet under your hips. Keep your knees slightly bent.
Muscle Toning
The bent-over barbell row might be one of the simplest upper back exercises out there. What I love about it is how it effectively trains both your upper and lower back muscles.
But that’s not all – it also engages some smaller muscles like your biceps and traps. It’s a comprehensive workout for your back, making it a favorite in my routine.
How to Do Bent-Over Barbell Row (in Steps)?
Step #1: Position Your Feet and Grip the Barbell
Stand with your feet flat on the floor, shoulder-width apart. Hold the barbell close to your chest.
Step #2: Bend Forward at the Waist
Bend forward from your waist while keeping your knees straight. Adjust the bend to your comfort level, aiming towards a 90-degree angle.
Step #3: Adjust Your Grip
Choose either an overhand or underhand grip for holding the barbell. Your hands should be shoulder-width apart.
Step #4: Maintain Proper Form
If necessary, use a weight bench for support. Ensure your back is straight and your core engaged.
Step #5: Perform the Row
Pull the barbell towards your waist, keeping your elbows close to your body. Slowly lower it back down after a brief pause.
Step #6: Repeat the Movement
Continue the motion for your desired number of repetitions, maintaining steady, controlled movements throughout.
5 Benefits of Bent-Over Barbell Rows
- Enhances Upper Body Strength: This exercise significantly strengthens the upper back, shoulders, and arms.
- Improves Posture: Regularly performing this exercise helps in improving posture by strengthening the back muscles.
- Engages Multiple Muscle Groups: It targets a variety of muscles including the lats, rhomboids, rear deltoids, traps, and even the biceps.
- Increases Functional Fitness: The movement mimics everyday activities, enhancing functional strength that can aid in daily tasks.
- Boosts Muscle Mass and Definition: Ideal for those looking to increase back muscle mass and definition, contributing to a more muscular appearance.
2. Seal Rows
Seal Rows are a unique variation of the traditional row exercise. Performed on a flat bench, this exercise isolates the back muscles by eliminating support from the lower body. Lying face down on the bench, you pull weights from below the bench in a rowing motion.
Muscles Trained
Seal Rows primarily target the upper and middle back muscles, including the latissimus dorsi, rhomboids, and trapezius. Secondary muscles engaged are the rear deltoids (shoulder muscles), biceps, and forearms.
How to Do Seal Rows (in Steps)?
Step #1: Set Up the Bench and Weights
Place a flat bench in a clear space. Position your dumbbells or barbells where you can reach them when lying on the bench.
Step #2: Lie Down on the Bench
Lie face down on the bench. Your torso should be flat on the bench, and your feet can either be on the floor or hanging off the end of the bench.
Step #3: Grip Your Weights
Reach down and grip the dumbbells or barbell with both hands. Your arms should be extended and positioned directly under your shoulders.
Step #4: Perform the Row
Lift the weights by bending your elbows and pulling your hands towards your ribcage. Squeeze your shoulder blades together at the top of the movement.
Step #5: Return to Starting Position
Lower the weights slowly back to the starting position. This counts as one repetition.
5 Benefits of Seal Rows
- Enhanced Muscle Isolation: The bench supports the body, allowing for more focused targeting of the back muscles.
- Reduced Lower Back Stress: Since your torso is supported, there is less strain on the lower back compared to traditional rows.
- Improved Posture and Back Strength: Regularly performing Seal Rows strengthens the back muscles, which can lead to improved posture.
- Increased Upper Body Stability: This exercise helps in developing stability in the shoulders and upper body.
- Versatility in Training: Seal Rows can be performed with various equipment like dumbbells, barbells, or even kettlebells, offering flexibility in your workout routine.
3. Pull Ups
A Pull-Up is a fundamental upper-body strength exercise that involves hanging from a bar. It’s a kind of exercise that you can even perform at home using a portable pull-up bar. In this workout, you pull yourself up until your chin is above the bar.
That’s why this exercise is renowned for its effectiveness in building upper body strength and requires minimal equipment—a sturdy, overhead bar is all you need.
Muscle Toning
Pull-ups mainly train the upper body, targeting several major muscle groups. The primary muscles worked are the latissimus dorsi (lats) in your back. Secondary muscles include the biceps, trapezius, deltoids (shoulders), and core muscles, which are engaged for stabilization during the exercise.
How to Do Pull-Ups (in Steps)?
Step #1: Grip the Bar
Stand under a pull-up bar. Grip the bar with your hands shoulder-width apart and palms facing away from you. This is the standard overhand grip.
Step #2: Hang from the Bar
Lift your feet off the ground so you are hanging from the bar. Keep your arms straight and your legs slightly in front of you to engage the core.
Step #3: Pull Yourself Up
Pull yourself up by bending your elbows and driving them down and back. Continue pulling until your chin is above the bar.
Step #4: Lower Yourself Down
Lower yourself back down to the starting position in a controlled manner, fully extending your arms.
Step #5: Repeat
Perform multiple repetitions as per your fitness level and workout goals.
5 Benefits of Pull Ups
- Builds Upper Body Strength: Effectively increases strength in the back, arms, and shoulders.
- Enhances Grip Strength: Regular practice improves grip strength, which is beneficial for other exercises and daily activities.
- Promotes Muscle Growth: Consistent pull-up routines can lead to significant muscle growth and definition in the upper body.
- Improves Overall Fitness: Pull-ups are a compound exercise, meaning they work multiple muscle groups, contributing to overall fitness and endurance.
- Can Be Modified for Skill Levels: Pull-ups can be modified to suit various fitness levels, from assisted pull-ups for beginners to weighted variations for advanced athletes.
15 Types of Pull-Ups
- Standard Pull-Up: Traditional grip with palms facing away, shoulder-width apart.
- Chin-Up: Palms facing towards you, typically with a closer grip.
- Wide-Grip Pull-Up: Hands placed wider than shoulder-width, emphasizing the lats.
- Close-Grip Pull-Up: Hands placed closer than shoulder width, targeting the biceps and middle back.
- Neutral-Grip Pull-Up: Palms facing each other, often done on parallel bars or a special grip.
- Commando Pull-Up: Gripping the bar with one hand in front and one behind, pulling up to each side alternately.
- Behind-the-Neck Pull-Up: Pulling up with the bar behind the neck, a more advanced and challenging variation.
- Weighted Pull-Up: Performed with added weight via a belt, vest, or holding a dumbbell between the feet.
- L-Sit Pull-Up: Raising the legs to an L-shape at the waist while performing the pull-up, increasing core engagement.
- One-Arm Pull-Up: An advanced variation using one arm, significantly increasing the difficulty.
- Archer Pull-Up: One arm extended out to the side, resembling an archer’s pose, to increase intensity.
- Kipping Pull-Up: Utilizing a swing or “kip” to propel the body upward, common in CrossFit.
- Clapping Pull-Up: Pulling up with enough force to clap at the top of the movement, then catching the bar again.
- Muscle-Up: Combining a pull-up with a dip to transition from below to above the bar.
- Towel Pull-Up: Draping towels over the bar and gripping them, increases grip strength and difficulty.
4. Wide Grip Pull Up
Wide Grip Pull-Ups are a variation of the classic pull-up exercise, distinguished by a wider grip that places more emphasis on the upper back and latissimus dorsi muscles. In this exercise, you grip a pull-up bar with your hands spaced wider than shoulder-width apart. The wider grip changes the dynamics of the pull-up, making it more challenging and targeting different muscle groups.
Muscle Toning
Wide Grip Pull-Ups primarily focus on the latissimus dorsi, the large muscles on either side of your back. They also effectively engage the upper back muscles, including the rhomboids and trapezius, as well as the rear deltoids (shoulders) and biceps. This exercise is excellent for developing a wide, muscular back and improving upper body strength.
How to Do Wide Grip Pull-Ups (in Steps)?
Step #1: Find a Suitable Pull-Up Bar
Locate a pull-up bar that is securely mounted and can support your weight.
Step #2: Grip the Bar
Grip the bar with both hands placed wider than your shoulder width. Your palms should be facing away from you.
Step #3: Hang from the Bar
Let your body hang from the bar with your arms fully extended. Keep your legs straight or slightly bent if the bar is lower.
Step #4: Pull Yourself Up
Pull your body up by squeezing your shoulder blades together and driving your elbows down. Continue to lift until your chin is above the bar.
Step #5: Lower Yourself Down
Slowly lower yourself back to the starting position, keeping the movement controlled.
5 Benefits of Wide Grip Pull-Ups
- Enhanced Upper Back Development: This variation places more emphasis on the upper back, aiding in muscle growth and strength.
- Increased Lat Activation: The wide grip is particularly effective in targeting the latissimus dorsi for a wider back.
- Improved Grip Strength: Performing wide grip pull-ups regularly can significantly improve your grip strength.
- Better Shoulder Stability and Mobility: These pull-ups help in developing shoulder stability and increasing joint mobility.
- Functional Upper Body Strength: This exercise enhances functional strength, useful in various sports and daily activities.
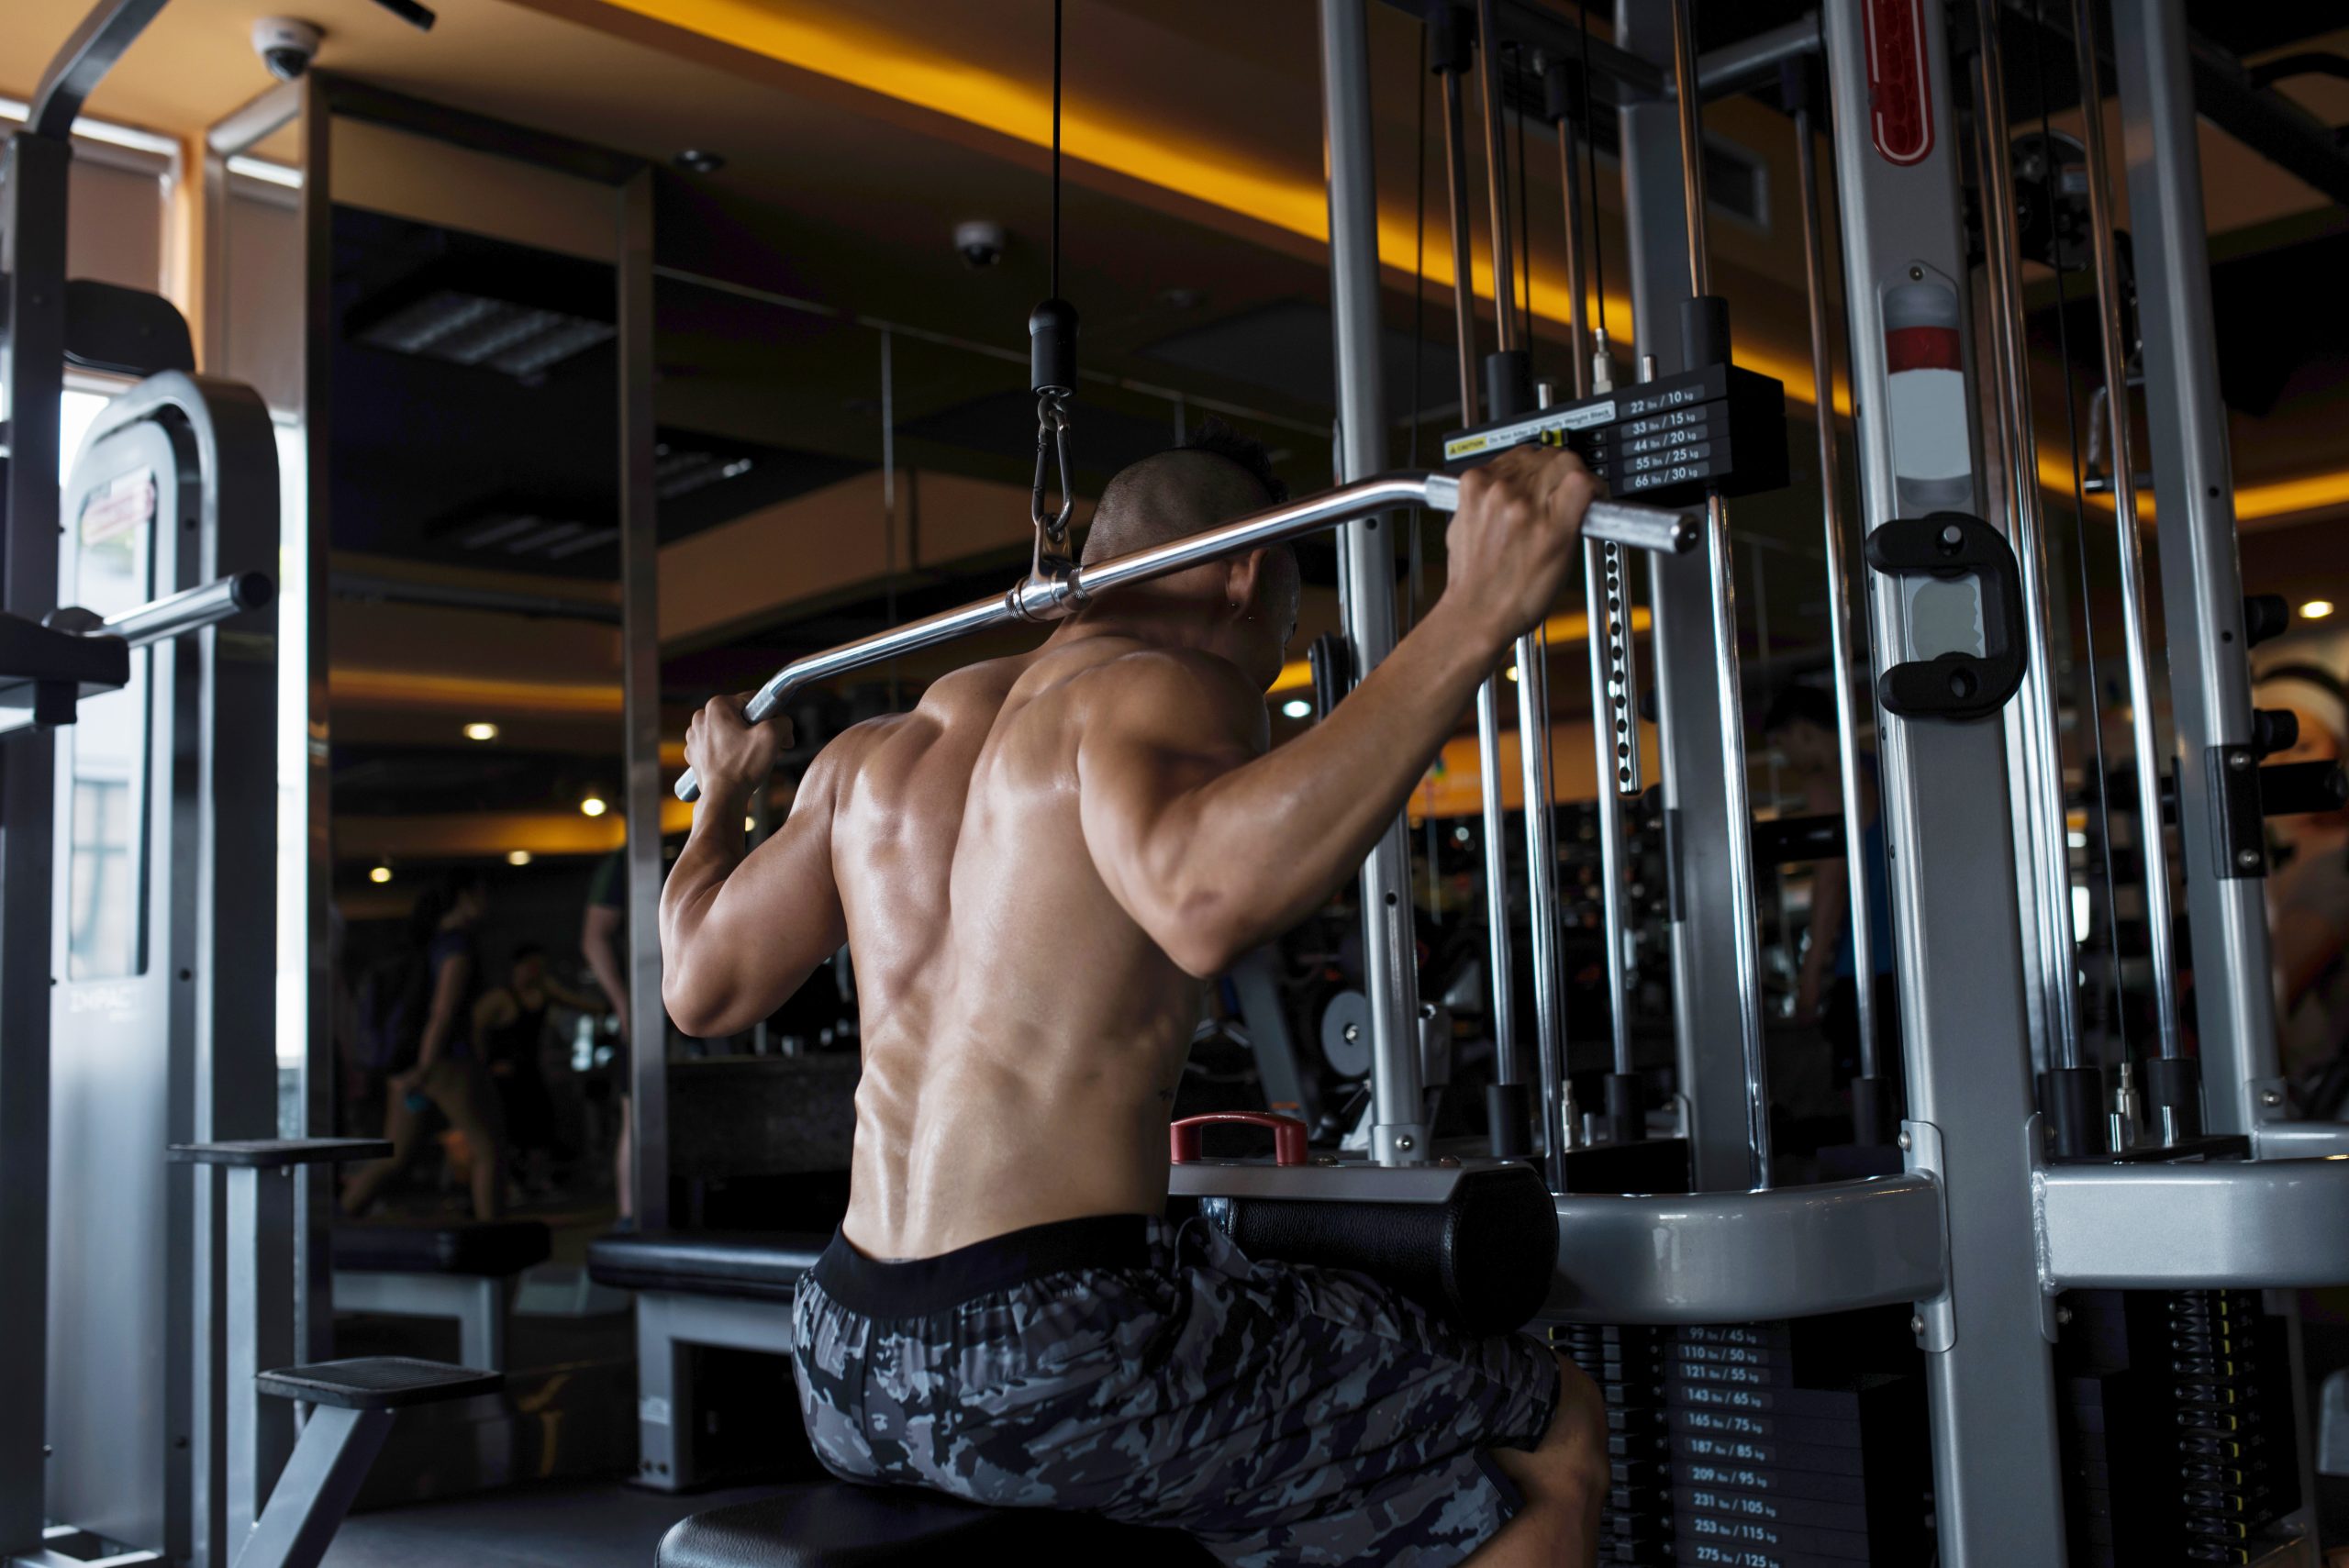
5. Seated Cable Row
Seated Cable Rows are a popular back exercise performed using a cable machine. This exercise involves sitting on a bench and pulling a weighted cable.
Muscles Toning
Rhomboids, Teres Major, and Latissimus Dorsi. The seated cable row is a great exercise for strengthening your upper back because it targets each muscle group in your back differently.
How to Do Seated Cable Rows (in Steps)?
Step #1: Set Up the Cable Machine
Adjust the cable machine with the desired weight and attach a straight bar or V-bar handle.
Step #2: Sit and Position Yourself
Sit on the machine bench with your feet flat against the footplates. Keep your knees slightly bent.
Step #3: Grip the Handle
Lean forward to grab the handle, then sit back with your back straight. Keep your arms extended forward.
Step #4: Perform the Row
Pull the handle towards your abdomen, keeping your back straight and elbows close to your body. Squeeze your shoulder blades together at the end of the movement.
Step #5: Return to Starting Position
Slowly extend your arms back to the starting position, maintaining control of the weight.
5 Benefits of Seated Cable Rows
- Targeted Back Muscle Engagement: This exercise allows for focused engagement of the back muscles.
- Improved Posture: Regularly performing seated rows helps strengthen the back muscles, aiding in posture improvement.
- Increased Back Strength and Endurance: The exercise enhances overall back strength and muscular endurance.
- Lower Back Safety: The seated position reduces the strain on the lower back compared to other rowing exercises.
- Versatility in Grip and Attachment: You can use different grips and attachments for varied muscle engagement and training stimuli.
6. T-Bar Row
T-bar rows are a compound exercise that targets the muscles in the back. It can be performed using a T-bar machine or a barbell set in a corner. This exercise involves lifting a barbell with weights attached, using a T-shaped handle or a neutral grip on the bar.
Muscle Toning
The primary focus of T-Bar Rows is on the middle and upper back muscles. Key muscles worked include the latissimus dorsi, rhomboids, and trapezius. The exercise also engages the rear deltoids (shoulders), biceps, and forearms.
How to Do T-Bar Rows (in Steps)?
Step #1: Set Up the Equipment
Secure one end of a barbell in a corner or use a T-bar row machine. Add appropriate weights to the free end of the barbell.
Step #2: Position Your Body
Stand over the bar with your feet shoulder-width apart. If using a barbell, straddle it; for a T-bar machine, stand on the platform.
Step #3: Grip the Bar
Bend at your hips and knees to grip the T-bar handle. If using a barbell, use a V-grip handle under the bar.
Step #4: Lift and Row
Lift the bar slightly off the ground, keeping your back straight. Pull the bar towards your chest, squeezing your shoulder blades together. Keep your elbows close to your body.
Step #5: Return to Starting Position
Lower the bar back down slowly, maintaining control throughout the movement.
5 Benefits of T-Bar Rows
- Comprehensive Back Muscle Development: Effectively targets a wide range of back muscles for balanced development.
- Enhanced Core Stability: Engages the core muscles for stability, strengthening the abdominal and lower back region.
- Improved Grip Strength: The exercise helps in developing grip strength, beneficial for various sports and activities.
- Versatility in Weight and Grip: Allows for different grips and weight adjustments to suit different fitness levels and goals.
- Functional Strength Improvement: Develops functional strength that translates into everyday activities and other sports.
7. One-Arm Dumbbell Row
One-arm dumbbell Rows are a unilateral exercise that targets the muscles of the upper back, focusing on one side at a time. This exercise involves using a dumbbell to perform a rowing motion while supporting your body with the other hand and knee on a bench.
Muscles Toning
This exercise primarily targets the latissimus dorsi, located on the sides of the back. It also works the upper back muscles, including the trapezius, rhomboids, and rear deltoids.
Additionally, the biceps and forearms are engaged during the movement, along with the core muscles, which help in maintaining stability.
How to Do One-Arm Dumbbell Rows (in Steps)?
Step #1: Set Up Your Position
Place a dumbbell on the floor beside a flat bench. Position yourself so that one hand and the corresponding knee are on the bench, with the other foot on the floor for stability.
Step #2: Grip the Dumbbell
Lean forward, maintaining a straight back, and grip the dumbbell with your free hand. Your arm should be extended, and your shoulder square.
Step #3: Perform the Row
Lift the dumbbell by bending your elbow and pulling it towards your side. Keep your elbow close to your body and squeeze your back muscles at the top of the movement.
Step #4: Lower the Dumbbell
Slowly lower the dumbbell back to the starting position, fully extending your arm.
Step #5: Repeat and Switch Sides
Complete your set on one side before switching to the other arm.
5 Benefits of One-Arm Dumbbell Rows
- Improved Muscular Balance: Helps in correcting strength imbalances between the two sides of the body.
- Enhanced Range of Motion: Offers a greater range of motion than bilateral rows, promoting deeper muscle engagement.
- Increased Core Engagement: Requires core stability, thus strengthening the abdominal and lower back muscles.
- Versatility for Different Fitness Levels: Suitable for all fitness levels, with the ability to easily adjust the weight of the dumbbell.
- Focus on Isolated Muscle Work: Allows for focused work on each side, ensuring that both sides of the back are equally trained.
8. Hammer Strength Machine Row
The Hammer Strength Machine Row is a machine-based exercise that targets the muscles in the back using a specific rowing motion. This exercise is performed on a Hammer Strength machine, known for its ergonomic design.
Muscle Toning
The primary focus of the Hammer Strength Machine Row is on the larger back muscles, including the latissimus dorsi, middle and lower trapezius, and rhomboids. It also engages the biceps and forearms as secondary muscles during the pulling motion. This exercise is beneficial for developing back strength, muscle size, and endurance.
How to Do Hammer Strength Machine Row (in Steps)?
Step #1: Adjust the Machine
Set the seat and chest pad of the Hammer Strength machine to fit your height. The handles should be at a comfortable reach when you’re seated.
Step #2: Choose Your Weight
Select an appropriate weight that allows you to perform the exercise with good form but is challenging enough for your strength level.
Step #3: Sit and Position Yourself
Sit on the machine with your chest against the pad. Place your feet flat on the floor or on the provided footrests.
Step #4: Grip the Handles
Grip the handles with both hands. Some machines offer multiple grip options to target different muscle groups.
Step #5: Perform the Row
Pull the handles towards your torso while squeezing your shoulder blades together. Keep your elbows close to your body.
Step #6: Return to Starting Position
Slowly extend your arms back to the starting position, controlling the weight throughout the movement.
5 Benefits of Hammer Strength Machine Row
- Targeted Muscle Engagement: The machine design ensures focused engagement of back muscles.
- Balanced Muscle Development: Independent arm movement allows for balanced strength development on both sides of the back.
- Reduced Risk of Injury: The machine provides a controlled environment, reducing the risk of injury compared to free weights.
- Customizable Resistance: Easy to adjust resistance levels to match different strength and fitness levels.
- Variety in Workout: Multiple grip options and the ability to work each side independently or together offer variety in your back workout routine.
Final Words
Our upper back holds many useful muscles that enable us to perform many daily routine tasks like rows, shrugs, pull-ups, and pull-downs. Our upper back is connected with shoulders, head and neck, upper and lower trunks, and even the chest — so proper exercise does great to its strength. These best upper back exercises will aid you in building mass and strength to a great extent.